AWS VPC Setup
Head over to the VPC Console to make sure you have a VPC listed there. You can use a default VPC. If it doesn’t exist, then let’s create one.
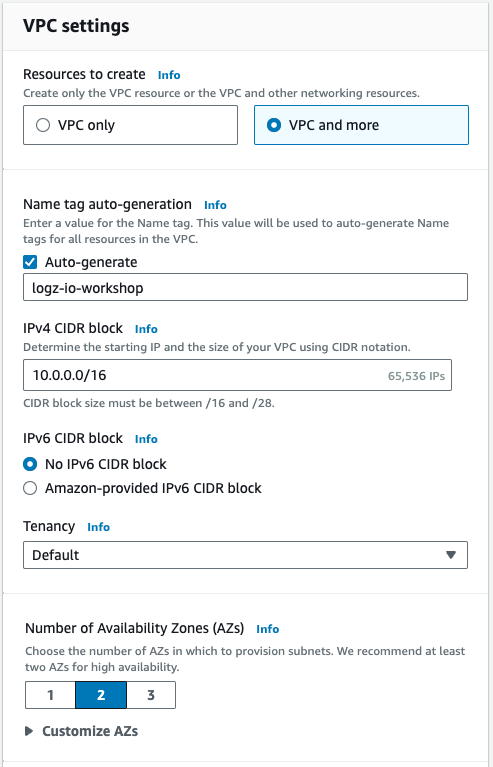
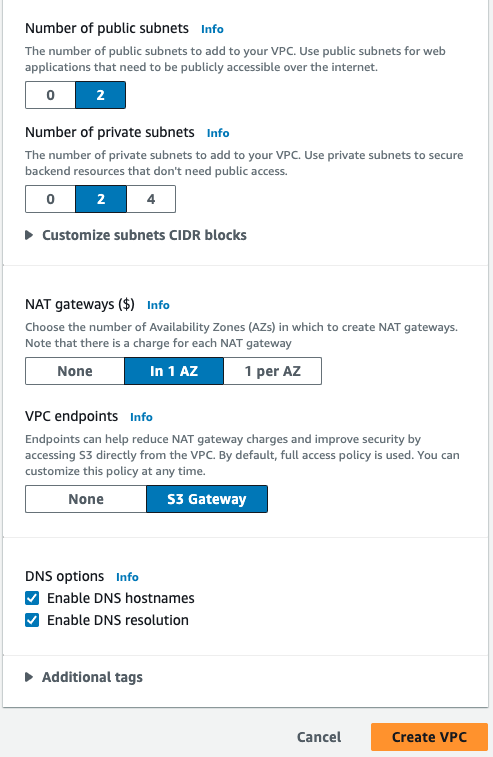
The easiest way to do it is to follow this link and fill in a couple of values. At the end you should have a VPC with 2 AZ’s.
- VPC settings: VPC and more
- Name tag auto-generation:
logz-io-workshop - Auto-generate: checked
- Number of Availability Zones (AZs): 2
- NAT gateways ($): In 1 AZ


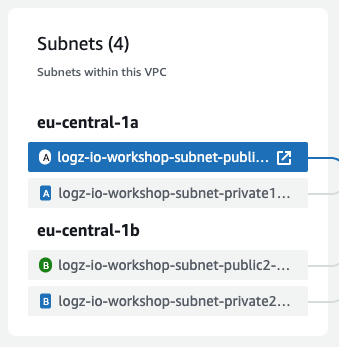
Preview of what you are creating.
The VPC names might differ but the picture should look very similar.

Post-creation adjustments
When the CreateVPC workflow finishes its job, click the View VPC button.
Choose one of the public subnets and click the open in new window icon.

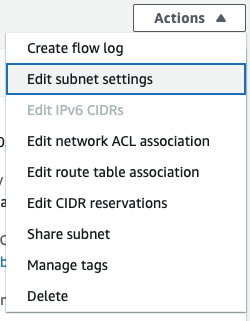
In the upper right part select Actions -> Edit subnet settings.

Check the Enable auto-assign public IPv4 address box and close the tab.
