Installation
Now that we have our Kubernetes cluster we can deploy the OpenTelemetry demo application. To make our lives easier we will be utilizing the helm charts to deploy the application.
First of all, let’s add the OpenTelemetry repo to our Helm repository
$ helm repo add open-telemetry https://open-telemetry.github.io/opentelemetry-helm-charts
$ helm repo update
To deploy the application, execute this helm command
$ helm install astronomy-shop open-telemetry/opentelemetry-demo --version 0.24.0 -n astronomy --create-namespace \
  --set default.envOverrides[0].name=OTEL_COLLECTOR_NAME,default.envOverrides[0].value='logzio-monitoring-otel-collector.monitoring.svc.cluster.local' \
  --set grafana.enabled=false \
  --set jaeger.enabled=false \
  --set prometheus.enabled=false \
  --set opentelemetry-collector.enabled=false \
  --set components.adService.resources.limits.memory="400Mi" \
  --set components.emailService.resources.limits.memory="300Mi" \
  --set components.frauddetectionService.resources.limits.memory="300Mi" \
  --set components.kafka.resources.limits.memory="700Mi" \
  --set components.loadgenerator.resources.limits.memory="200Mi" \
  --set components.recommendationService.resources.limits.memory="40Mi"
If you see something like this, it means the application was deployed successfully
NAME: astronomy-shop
LAST DEPLOYED: Wed Jan 31 12:14:46 2024
NAMESPACE: astronomy
STATUS: deployed
REVISION: 1
TEST SUITE: None
NOTES:
=======================================================================================


 ██████╗ ████████╗███████╗██╗         ██████╗ ███████╗███╗   ███╗ ██████╗
██╔═══██╗╚══██╔══╝██╔════╝██║         ██╔══██╗██╔════╝████╗ ████║██╔═══██╗
██║   ██║   ██║   █████╗  ██║         ██║  ██║█████╗  ██╔████╔██║██║   ██║
██║   ██║   ██║   ██╔══╝  ██║         ██║  ██║██╔══╝  ██║╚██╔╝██║██║   ██║
╚██████╔╝   ██║   ███████╗███████╗    ██████╔╝███████╗██║ ╚═╝ ██║╚██████╔╝
 ╚═════╝    ╚═╝   ╚══════╝╚══════╝    ╚═════╝ ╚══════╝╚═╝     ╚═╝ ╚═════╝


- All services are available via the Frontend proxy: http://localhost:8080
  by running these commands:
     kubectl --namespace astronomy-shop port-forward svc/astronomy-shop-frontendproxy 8080:8080

  The following services are available at these paths once the proxy is exposed:
  Webstore             http://localhost:8080/
  Grafana              http://localhost:8080/grafana/
  Feature Flags UI     http://localhost:8080/feature/
  Load Generator UI    http://localhost:8080/loadgen/
  Jaeger UI            http://localhost:8080/jaeger/ui/
Let’s ensure all of the components are running. We can do it either from the console to make sure everything is in Running state:
$ kubectl get pods -n astronomy
…or using K8s360 dashboards. Let’s filter for the astronomy namespace and switch the view to Pod

Now let’s make our frontend visible in a browser, so we are ready for the next section. Run this command:
$ nohup kubectl port-forward service/astronomy-shop-frontendproxy -n astronomy 8080:8080 &
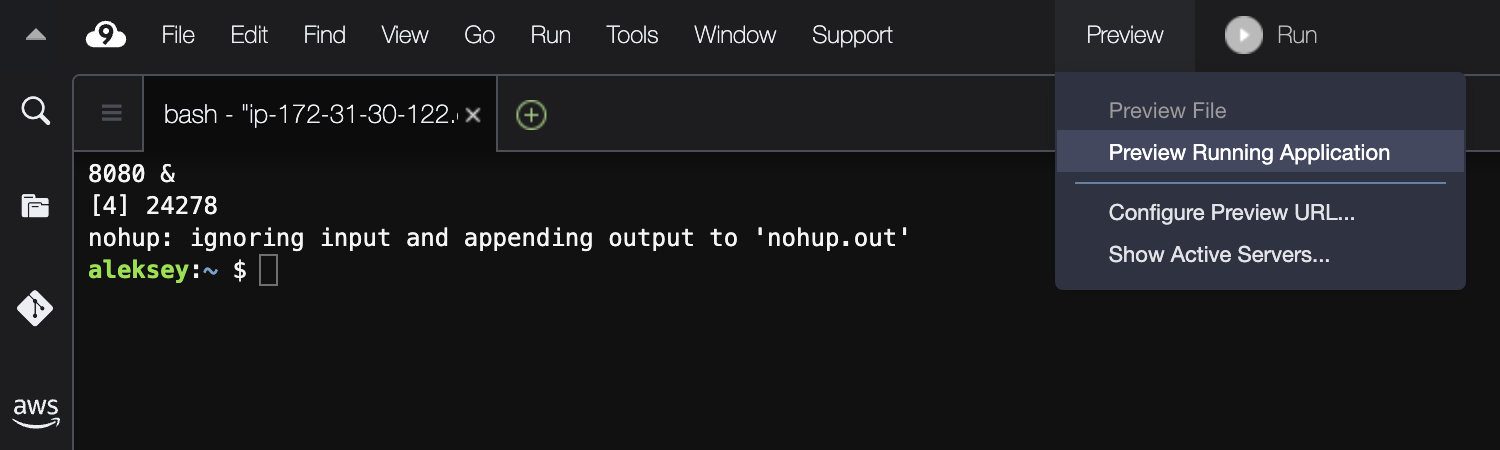
Open the application page: in Cloud9 console click Preview / Preview Running Application
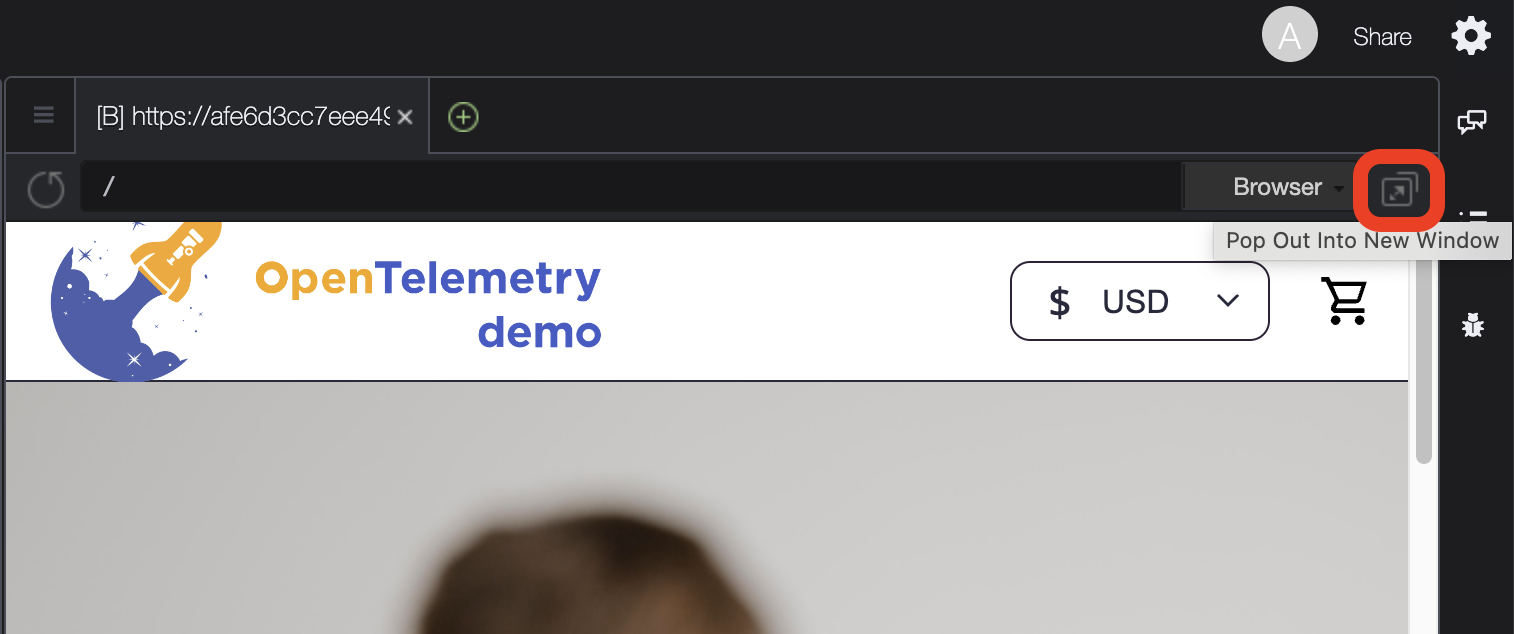
In the preview window click Pop Out Into New Window
Keep this tab open
We are ready for the next section!